7 Steps To Create a Yes/No ● Dot Schedule In Revit
Jul 26, 2020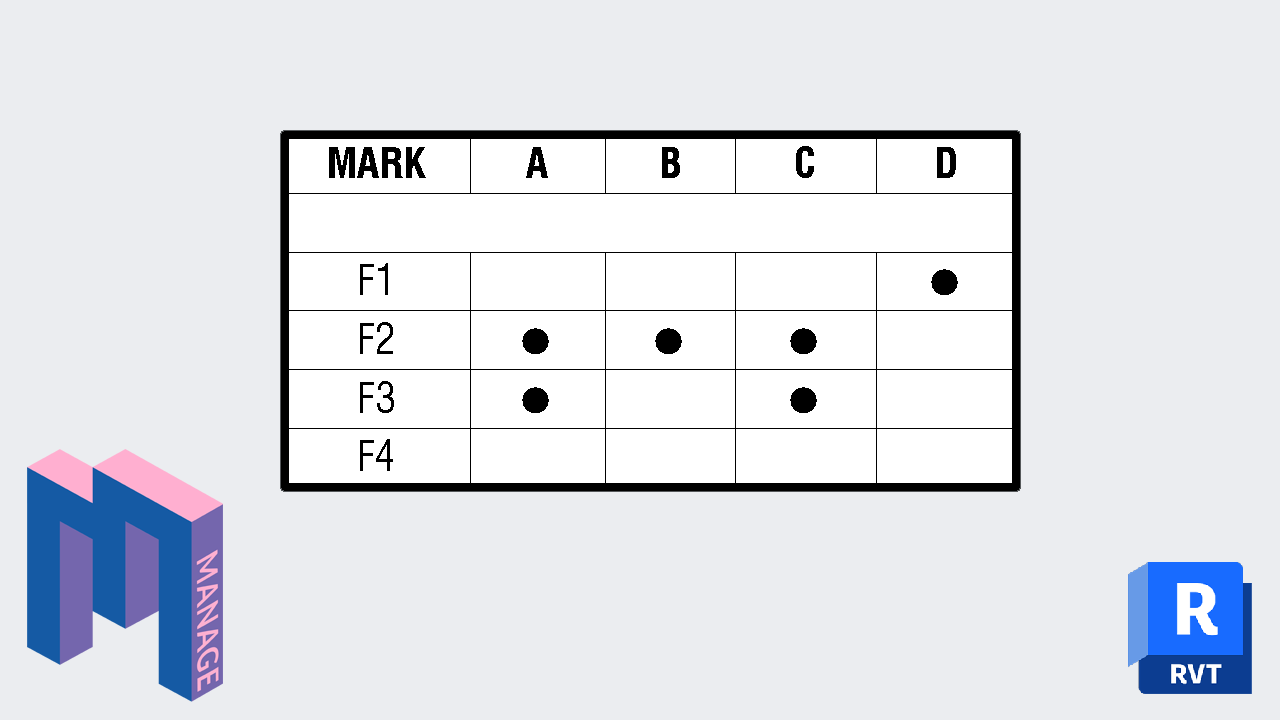
In this guide, you will learn how to create a dot schedule in Revit from scratch. We will use the context of a historic building renovation project. We have 4 existing windows. Each one has specific interventions to get properly repaired and restored. Let’s get started!
Here is a video version of the post if you are interested:


Here is our existing windows schedule. If you don’t know the basics of creating schedules in Revit, make sure to check out this blog post.

Now, go to the Manage tabs. In this case, we will select the Project Parameters tool. We probably won’t be using these parameters in tags, so the Shared Parameters feature is not required.

Click on Add… to create new parameters.

Now, you will select the Instance option. Set the Type of Parameter setting to Yes/No. Group the parameter under Other. Although you can select any category you like, it doesn’t really matter. Just make sure all parameters are in the same group.
As you can see, we use a prefix for the parameter’s name. If you have multiple interventions for the restoration, it’s good to have the parameters numbered. In this case, we use prefix W01 and then the description (replace broken glass). We can rename the parameter name when the schedule is placed, so you won’t have to see this prefix when printed.

Make sure that the parameter is assigned to the Windows category.

Let’s say there are 4 possible interventions for these windows:
You will need to create a parameter for each of these interventions. When done, that’s what you should see when you select any window:

A little side note: When the checkbox is greyed, it means the parameter is neither Yes or No. The value is just void. You have to click the parameter box to actually change the value to yes or no.

Go back to your windows schedule. Click on Fields.

You should see the 4 new parameters. Add them to the schedule by using the arrows.

When you are inside the schedule, you should see the boxes like this:

But when the schedule is placed on a sheet, you will see YES and NO instead of the boxes. Boxes that are grayed out won’t display any value at all.

Now, that’s when we need to do a little magic to replace these boring yes and no by dots. Go back to the Fields of the schedule. Click on the Fx button to create a calculated value.

First thing to do is to select Text as the type. Then, type in a name. It can be almost the exact same name as the original parameter. In this case, we just add a little x on the prefix to distinguish. Then, you will have to create a formula. Start by clicking on the 3 little dots.

Select the correct parameter, in this case, the one starting with W01.

As you can see, it’s added to the formula.
Now, we will create a If statement to create our formula. The if statement works like this:
if([Parameter’s Name], “Text if yes”, “Text if no”)
In our case, it should look like this. Don’t forget the space after the comma.
if([W01-Replace Broken], “●”, “”)
That means if the Replace Broken Glass value is YES, a dot will be displayed. If it is NO, nothing will be displayed. Fill it up in the calculated value formula.

But wait, where do you get the dot ● character? You can copy/paste from this blog post. Don’t copy/paste the rest of the formula. It might cause issues because of the font used on this website.
Your calculated value parameter should now be complete! Move it up so it is next to the original parameter.

Repeat the same process to create the other calculated values. To save time, you can copy/paste parts of the the formula. In the end, you should have the following fields:

For this system to work properly, we need 2 schedules: work schedule and sheet schedule. Our work schedule is already complete. Duplicate it. Rename the original one to make clear it is intended for internal use.

Now, go to the schedule that will be placed on a sheet. Go to Formatting menu.

Select the original parameters. Check the Hidden Field box.

Your sheet schedule should now look like this:

Obviously, we don’t want to see these prefix in the schedule. Enter the schedule and rename them to whatever you want. For better visibility, you can set the header orientation to vertical.

For even better results, you can group the parameters together.

Fill up a name for your group. In this case, we call it Interventions.
Look up at the final result. Isn’t that beautiful?

If you think that’s too much text in the schedule, you could also use numbers or letters for the intervention names and refer to a legend.

In this case, we used dots. But you can use any characters you want. Open the Windows Character Map (type it in the search bar). Scroll down to find any character. Click select, then Copy. Paste it in the formula, inside the calculated value.

Why not use a happy face instead of a dot?

Or you might be tempted to use checks and x symbols. Nothing stops you from adding a symbol when the value is equal to no.


Do you want to learn more cool tricks about schedules? Make sure to read our pamphlets about this very topic. It is entirely free and has been downloaded thousand of times.

🔥 Save big: Get 25% off on all BIM Pure courses & content.
🧠 Get Revit Mastery: Access our full catalog of courses, templates, families, and live events.
Promotion ends on June 22nd.
Enter your details below to get this free guide.