Revit + Dynamo Tutorial – Image Mapping on Curtain Panels
Nov 02, 2021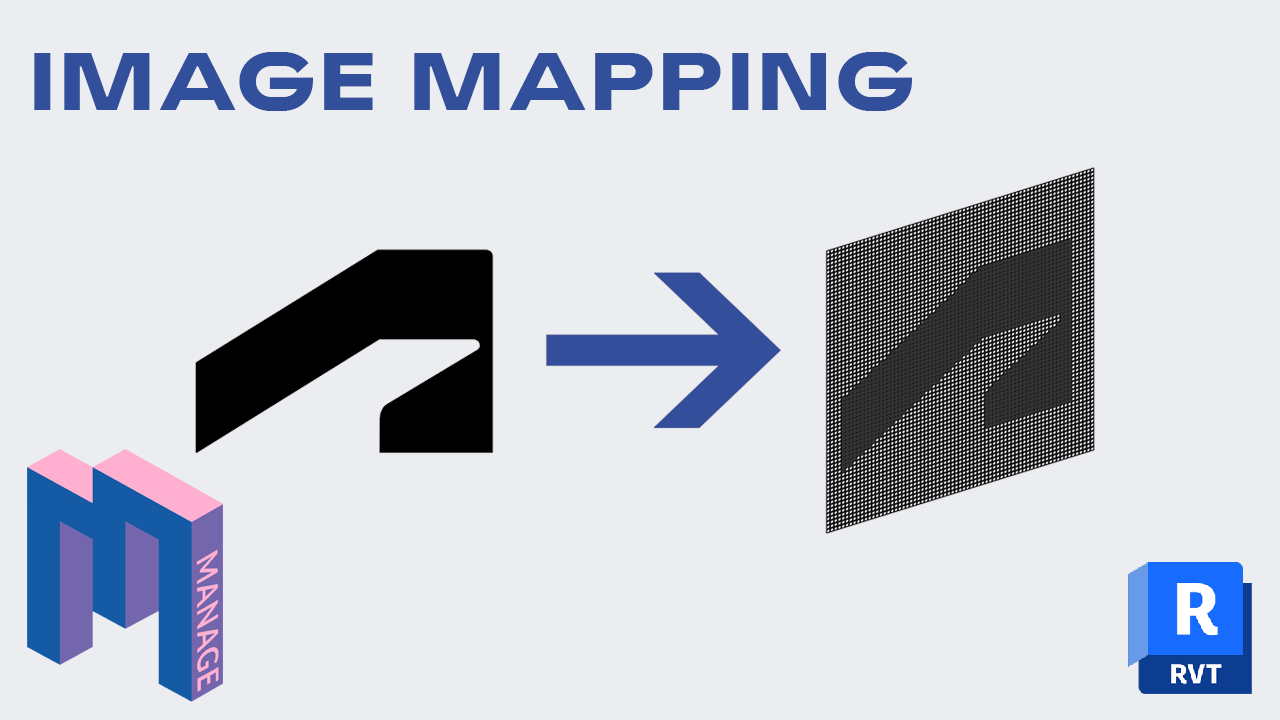
In a recent episode of BIM Pure Live with Niko G., we’ve discussed a Dynamo script that allows you to map an image to a curtain wall. Each curtain panel opening is set to match the brightness of the image.
Niko kindly shared the script, which I slightly modified to fix a couple of minor issues.
You can download the Dynamo script here and the Revit file here.
Here are the complete instructions to recreate the curtain panel family and the dynamo script. If you want, you can scroll down to only get the instructions on how to use the completed script.
First, you’ll need a curtain panel family that is compatible with the script. It needs to have a hole in the center that can be controlled by a radius parameter.
Create a new family using the Curtain Panel Family template. Go to an elevation view and create an extrusion. Lock it to the reference planes.

Then, create a new horizontal reference plane. Place a dimension and click on the EQ icon to make sure it will always be at the center of the panel.

Now, create a void extrusion with the circle shape. Place it at the intersection of the center reference planes. Select the extrusion sketch and check the Center Mark Visible tool.

You should see the center mark. Align the mark to both the horizontal and vertical reference planes.

Now, add a new “Radius” instance parameter and set it to the circle void extrusion.

Finally, add material and thickness parameters to the panel. Make sure thickness is an instance parameter. Your family is ready to be loaded in your project. Assign the family to a curtain wall.

Then, create a curtain wall and set the vertical + horizontal grid segments. Make sure the proportions are about right.

First, add these 3 nodes to read an image file from your computer.

Then, you can add a “Watch Image” node. This way, you can visualize the image when the script is run to make sure you have the correct one.

In parallel to getting the image, create a Select Model Element node that will be used to select the curtain wall. You can notice there is a Python Script node. This is used to extract the Horizontal and Vertical amount of grids in this curtain wall instance. The List.Deconstruct node is used to split the horizontal and vertical grids in 2 different outputs.
Then, we use the simple mathematical formula to add +1 to each value. This is because if there are 5 grids, it means there are 6 panels in the row or column. Other list nodes help to organize the output for the rest of the script.
On the top, you can see we get all the curtain panels and organize them with sublists for each row.

Use a Image.Pixels node. This will convert the image resolution to a specific amount of pixels. This amount is mapped from the number of horizontal and vertical curtain panels we’ve found in the last step. It means an 1900x1080 image will be converted to 50x40 if our curtain panels has 50 horizontal curtain panels and 40 vertical panels.
The List.Reverse nodes are used to make sure the image isn’t backwards.
The Color.Brightness node is used to convert an RGB color value to a brightness value. 0 is black and 1 is white, everything in between is a tint of grey.
The Math.Round value is used to remove some digits to the brightness value. For example, it will convert a brightness value from 0.3498797 to 0.35. In this example, we set the amount of digits to 2.
![]()
Now, we want the brightness value to be converted to a radius value. This radius value will be used for each opening. We know the minimum value will be 50mm and the maximum 300mm. Use the Math.MapTo node to change the brightness value to something between 50 and 300. For example, 0 becomes 50, 0.5 becomes 175 and 1 becomes 300.

Finally, use a Element.SetParameterByName node to modify the radius value of each curtain panel.

Now that you’ve created your script, time to use it. There are 2 inputs you need to set up: select a curtain wall and set an image from your computer. Be careful: curtain walls with too many curtain panels might cause the script to run quite slowly.
You can play with the panels’ density depending on your needs. With images that are more detailed, you will need more panels to get an interesting effect.
Here are some examples you can create with this script.


Enter your details below to get this free guide.