11 Tips to Master Revit User Interface
Aug 21, 2016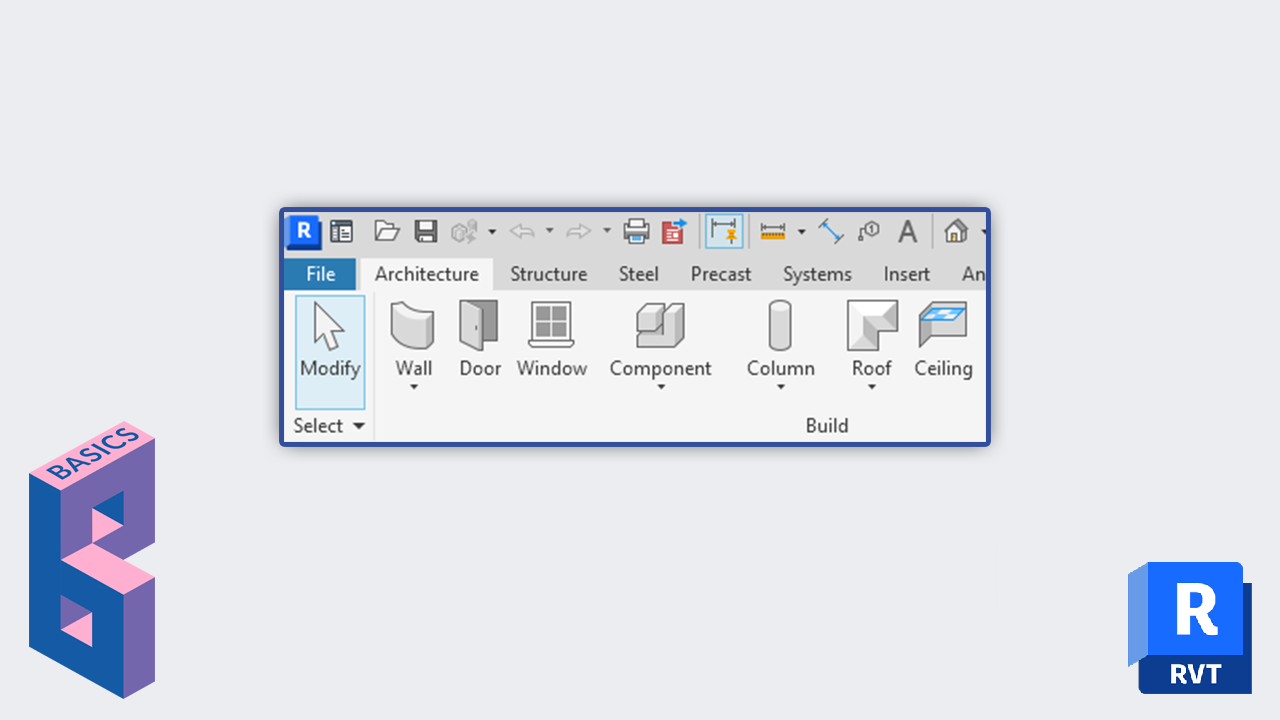
First time you open Revit, you are confused and have no idea what is going on. What are all these bars, parameters, icons, trays and browsers? The goal of this guide is to explain the user interface as simply as possible. You will also receive 11 tips to have a smooth and comfortable beginner experience.
Before anything else, you need to understand where all tools and commands are located, and what the Ribbon contains.

The ribbon is located at the top of your screen. It contains almost all tools used Revit. It is divided by tabs, which are described below.

Every architecture element that appears in 3D in your model is created from this tab. You will also find tools like Rooms, levels and grids.

This tab is designed to be used by structural engineers. If you are an architect or designer, it is used it for beams, columns and foundation.

Any external files coming to your model is inserted from this tab. Images, CAD, linked Revit, families.

Every tag, dimension, detailing lines, text symbol and revision cloud come from here. They are added to a single view and are not part of the 3D model.

This is where you act like the almighty and create the topography, trees, parking and other fun stuff around your building. It also contains the Conceptual Mass that is used to create weird 3D volumes.

If you are working with a team or with consultants, this is the tab you are looking for. You will find synchronize and reload tools, as well as Worksets.

Ceiling plan, 3D views, wall sections, door schedule, legends, name it! It is created from here. You also control the sheets and title blocks.

This tab is mostly for BIM managers and advanced users. It contains settings like lineweight, parameters, phases and design options.

Make changes to elements that are already created in your model. This is where you will find basic commands like move, copy, mirror, etc. The content of this tab is different depending on which element you select.

This is where you make adjustments to your view. Select the level of detail, the graphic display option, the scale and the crop region. You can also see hidden elements and bring them back if needed.

This let you decide what you can or cannot select. A red X on these symbols means that the selection category is disabled. The icon on the right lets you filter elements if you were to make a selection with multiple items.

This bar appears when creating new elements or using certain commands. The content is different depending on the type of item you are adding.

Contains basic tools (save, undo, redo) as well as commands that are most frequently used. You can add and remove any command from this bar.


PROJECT BROWSER is used to access every view, sheet, family, schedule, legend and groups in your project. If you were to close it by mistake, it can be found on the VIEW tab, by checking the box on User Interface on the right of your screen.

PROPERTIES is used to modify selected elements. If closed, bring it back by pressing PP or by going to the MODIFY tab and clicking Properties, next to modify cursor.
Shortcuts in Revit are used by pressing two letters, no need to press enter. You can add or modify shortcuts by typing KS.
Each model has a default unit that is used when you type a value. However, you can type any units you want. For example, in an imperial file, typing 152mm is the same as typing 6.
Working with Revit on a single screen is a claustrophobic experience. The best workflow is to put Project Browser and Properties on the 2nd screen.
Right-clicking on an element makes a menu appear. The content is different depending on what is selected. Many useful commands are hidden on this menu.

Many users spend countless hours scrolling down the project browser, trying to find a hidden view or family. Instead, use SEARCH (CTRL-F) to type what you are looking for and save a lot of time.

A lot of new users get confused when adding new elements because they are stuck in the creation mode. Revit wants you to create many elements unless you tell it to stop. Hit ESC twice to go back to normal.
Working with 3D view is fun and useful. Open both a 3D view and floor plan, then use WINDOW TILE (WT) to put your views next to each other.
See all your open views on a dropdown menu by clicking SWITCH WINDOWS on the quick access toolbar located on top of your screen.
Too many opened views can slow you down. Instead of individually closing each view, click on CLOSE HIDDEN to close them all, except the ones that are visible on your screen. It is located on quick access toolbar.
Many tabs are useless if you are an architect or designer. Go to OPTIONS (by clicking the upper left big blue R), click User Interface and uncheck the boxes below.

When selecting an element, you notice that MODIFY tab becomes CONTEXTUAL tab. All the modify tools are still there, but new specific commands are added. These commands have a green tint below them.

Enter your details below to get this free guide.