11 Tips to Create Interior Finishes in Revit
Jan 08, 2019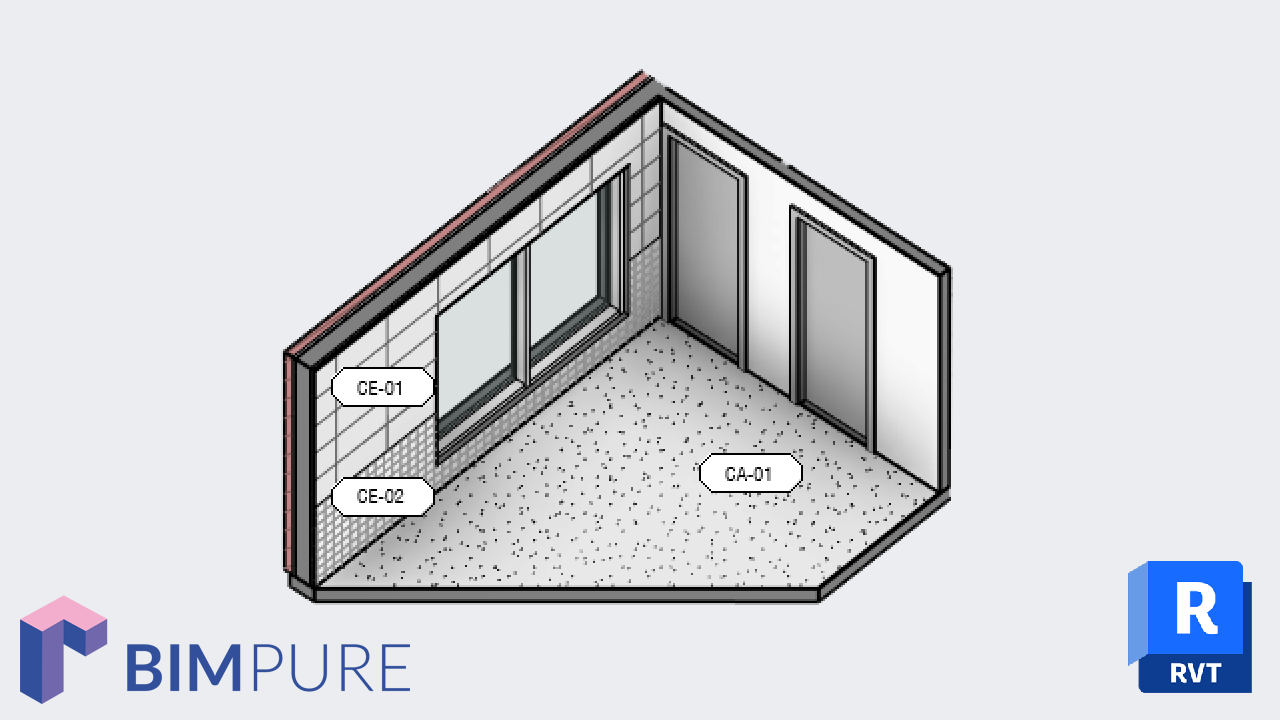
There are many ways to create interior finishes drawings in Revit. Most of them are terrible and inefficient. After years of experimentation and trying different systems, we found the best way to create finishes plan. The technique taught in this guide aims to provide a consistent strategy that can be used in plan views, elevations and even 3D views. Good luck.
Create a new wall and floor type with a thickness of about 12mm (1/2”). Call these elements INT-Finish Floor and INT-Finish Wall. You can adapt the name to match your existing standards.
Model these elements where you want to indicate a specific finish in your documents. In the case of a floor, make sure to set an offset equivalent to the element thickness so it sits over the main floor element. Also, make sure the main model elements don’t include a finish layer.

By default, the additional finish wall will go over openings such as doors and windows. The trick to fix this issue is quite simple: use the Join feature in the Modify tab to join both walls together. The finish wall will then automatically embed all the openings.

A benefit of this strategy is that it allows you to hide the floors and walls finish pattern in most views. That way, the finishes can be seen in specific finishes view but remain invisible in other construction documents.
Go to the Visibility/Graphics menu by using shortcut VG. Go to the filter submenu. Click to add a new filter.

Create a filter called Interior Finishes. Include the Floors and Walls categories. Set the rules so the Type Comments equals FINISH.

Add this new filter to the view. Uncheck the visibility parameter.

The final step to make the filter works is to add the FINISH parameter value in the Type Comments of the finish wall and floor. You can adjust this value by selecting the thin finish wall/floor and by clicking on Edit Type. Scroll down to find the Type Comments parameter.

The views that include the Interior Finishes filter with visibility turned off won’t show the finishes. The finishes will be visible in all other views. Make sure to use view templates to quickly add this filter to multiple views at once.

Most projects have several interior finishes. Instead of creating multiple types of finish wall/floor, use the Paint tool to save time and avoid creating hundreds of wall types. You will find the paint tool in the modify tab.
In the example below, we assign a wood boards material. The original pattern is turned into a horizontal lines pattern that represents wood.

Make sure that the material you assign has been customized to display the appropriate surface pattern.
If you need to assign multiple materials on a thin wall/floor, use the Split Face tool. In the example below, we use the tool to split the wall at 1000mm above the ground. This way, we can use two different kinds of finishes without having to model multiple walls.
To use Split Face, select the tool and click on the face of the element you want to split. Draw a line that doesn’t exceed the yellow boundary lines.

Create a new family by using the Material Tags template. It is good idea to use a different tag shape than the exterior material tag. In this example, we use some kind of extended hexagonal shape. Add a label that displays the material Mark. Load the family in your project and create a Material Tag for each different material.

Time to create a material legend using the Material Takeoff tool. Go to the View tab and click on the Schedules drop-down menu. Select Material Takeoff. Use the fields described in the image below.

Then, add a filter for Material:Name containing FINISH, or any abbreviation you would like to use.

In the Sorting/Grouping submenu, sort by Keynote (and add a Header) then sort by Mark. Uncheck Itemize Every Instance.

Go to the Formatting submenu and activate the Hidden field box for the Material: Name parameter. This parameter is used for filtering but is not required in the schedule itself.

Now, modify the names of the material you want to include in your schedule. You must add the FINISH prefix in their name so they appear in the schedule. In the example below, we add the prefix to the carpet, ceramic and hexagonal tiles materials. However, we keep the Gypsum material without the prefix because it is not used as a finish and doesn’t belong in the schedule.

The image below represent what you should see in your schedule. It is impossible to add new parameters to materials. Instead, use the existing parameters and use them for your own purpose. For example, Material:URL becomes NOTES and Material:Description becomes DIMENSIONS. Fill out the headers like in the image below.

Now, time to fill out the schedule with all the required information about the materials. There is two ways to do such a thing. The first is to fill the information directly on the schedule.

The problem is that we have no idea what material is in the first row, especially because the Material:Name is hidden. The workaround is to add the info directly on the Material Tab. Go back to the Material menu and find the materials that are missing on your schedule.

Time to put everything together on a sheet so you can put the final touch. Adjust the appearance of the schedule: add thick outline grids, adjust the fonts of the title, headers and body. Adjust the columns size. Center the text for each column. Another important point to know: changing the Type Mark on a material tag inside a view will also affect the value inside the schedule. Check out pamphlet #2 to learn more about schedules.

Want to download all the schedules, material tags and other elements discussed in this blog post? Check out our DESIGN package.

There are more tips waiting for you! Download the brand new edition of our seasonal pamphlet. You will find how to use the double pattern feature and how to indicate finishes inside 3D views.
Enter your details below to get this free guide.